
Table of Contents
Shea butter has long been a staple in African households, cherished not just for its rich, creamy texture, but also for its skin-healing properties. Extracted from the nuts of the African shea tree, shea butter is packed with vitamins A, E, and F, essential fatty acids, and antioxidants that nourish, moisturize, and protect the skin. If you’ve ever wondered how to elevate your skincare routine without spending a fortune, making your own DIY shea butter lotion is the perfect place to start.
Creating your own shea butter lotion at home is easier than it sounds and infinitely rewarding. It allows you to nourish your skin naturally, customize your products, and celebrate the beauty of African ingredients. With just a few simple steps, you can have a rich, creamy lotion that hydrates deeply, protects your skin, and gives you that coveted glow. Not only is it cost-effective, but it also ensures your skin is free from harsh chemicals, preservatives, and additives often found in commercial products.
SEE ALSO: Can Modern Skincare Really Outperform Traditional Skincare?
Why Choose Shea Butter?
Before diving into the recipe, it’s important to understand why shea butter is such a powerhouse for skin. Its emollient qualities deeply hydrate dry skin, while its anti-inflammatory properties help calm redness, irritation, and minor skin conditions. Rich in natural vitamins, shea butter encourages cell regeneration, leaving your skin supple, radiant, and youthful. Unlike synthetic moisturizers that may temporarily coat the skin, shea butter penetrates deeply, repairing and nourishing from within.
Using African ingredients like shea butter is a way of connection to heritage and sustainability. African women have relied on shea butter for centuries to protect, nourish, and heal the skin. By incorporating it into a DIY lotion, you honor those traditions while modernizing them for contemporary skincare needs. Moreover, it promotes ethical sourcing and supports local economies in West Africa where shea butter is harvested.
Incorporating shea butter into a DIY lotion also allows you to customize ingredients based on your skin’s specific needs. For instance, adding natural oils can enhance hydration, while essential oils introduce therapeutic scents and added skin benefits. The result is a personalized, all-natural lotion that supports glowing, healthy skin.
Ingredients You’ll Need
Creating your own shea butter lotion requires only a handful of natural ingredients. Here’s what you’ll need:
- Raw shea butter (1/2 cup): Choose unrefined shea butter to retain all vitamins and nutrients. This acts as the main base, thick and emollient.
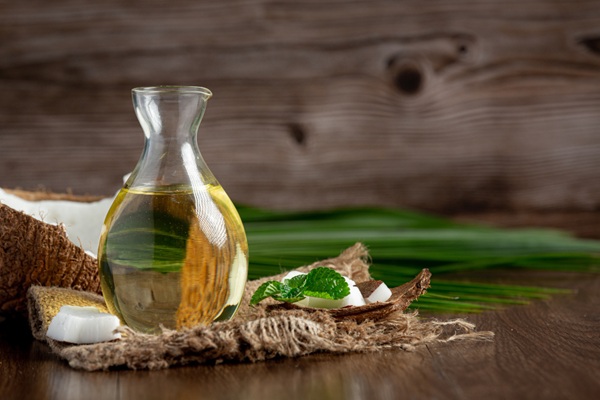
- Coconut oil (1/4 cup): Coconut oil softens and melts nicely with shea butter. It also moisturizes and softens the skin while adding a subtle tropical scent.
- Sweet almond oil or jojoba oil (2 tablespoons): Balances skin oils and helps avoid greasy feel as well as maintain elasticity – optional
- Aloe vera gel (2 tablespoons): Soothes irritation and adds hydration – optional
- Essential oils (optional, 5–10 drops): Lavender, rose, or frankincense for fragrance and skin benefits.
- Vitamin E oil (1 teaspoon): Natural preservative and antioxidant, extends shelf life and promotes skin healing.
Note that coconut oil can be comedogenic (pore-clogging) for very oily or acne-prone skin, so if your skin is prone to breakouts, you can reduce coconut oil to 2 tablespoons and increase shea butter slightly for balance.
Step-by-Step Guide to Making Your Lotion
- Melt the Butters and Oils:
Begin by gently melting the shea butter and coconut oil together. Use a double boiler method, a heat-safe bowl over simmering water, to avoid overheating, which can degrade nutrients. Stir occasionally until fully melted. - Mix in Additional Oils:
Remove the mixture from heat and add your sweet almond or jojoba oil. Stir well to combine, ensuring all oils are evenly distributed. This is also the moment to add vitamin E oil for its skin-protective benefits. - Cool and Add Aloe Vera:
Allow the mixture to cool slightly, then fold in the aloe vera gel. Aloe vera adds a fresh, lightweight texture while retaining the lotion’s creamy consistency. Make sure the mixture is not too hot, or the aloe will lose its beneficial properties. - Essential Oils for Fragrance and Skin Benefits:
Add 5–10 drops of your chosen essential oil. Lavender is calming and antibacterial, rose is hydrating and soothing, and frankincense helps with skin tone and elasticity. Stir gently. - Whip It for Creaminess:
Use a hand mixer or whisk to whip the lotion for 5–7 minutes until light, airy, and creamy. Whipping adds volume and creates a luxurious texture similar to commercial lotions. - Transfer and Store:
Transfer the whipped lotion into a clean, airtight jar. Store in a cool, dry place. Your DIY shea butter lotion can last up to 3 months, depending on storage and the freshness of your ingredients.
Tips for Optimal Glow
- Patch Test First: Even natural ingredients can irritate sensitive skin. Test a small amount on your inner arm before full application.
- Target Dry Areas: Apply generously to elbows, knees, hands, and feet where skin is prone to dryness.
- Daily Application: For best results, use morning and night to maintain hydration and promote radiant skin.
- Mix It Up: Experiment with other African oils like baobab or marula to customize the lotion’s properties. Baobab is rich in vitamin C and helps with skin elasticity, while marula is antioxidant-rich and anti-inflammatory.
The Benefits of DIY Skincare
Making your own shea butter lotion isn’t just about cost savings, it’s about empowerment. By creating your skincare products, you:
- Avoid Harmful Chemicals: Many store-bought lotions contain parabens, synthetic fragrances, and preservatives that can irritate skin.
- Control Ingredients: You know exactly what’s going on your skin.
- Support Natural Beauty: DIY products celebrate authentic, sustainable, and culturally rooted beauty practices.
- Encourage Mindful Self-Care: The process itself, melting, mixing, and whipping, is therapeutic and reinforces the value of self-care.
Do you need a preservative?
- Shelf-stable ingredients only (shea butter, coconut oil, almond/jojoba oil): No preservative is needed if your lotion contains no water. These oils are naturally resistant to bacterial growth.
- Adding aloe vera gel (water-based): Now you’re introducing water, which is a breeding ground for bacteria and mold. Without a preservative, your DIY lotion will last only about 1–2 weeks in a cool, dry place, possibly less if the climate is hot and humid.
How to preserve your shea butter lotion
When making DIY lotions, preservation is a crucial consideration, especially when your formula includes water-based ingredients like aloe vera gel. As stated earlier, oils alone, such as shea butter, coconut oil, or almond oil, are naturally resistant to bacteria and mold, so they can remain stable for weeks or even months without preservatives. However, as soon as you add water or water-containing ingredients, you create an environment where bacteria, yeast, and mold can grow rapidly. Without proper preservation, your homemade lotion could spoil within a week or two, especially in hot and humid climates, posing a risk to your skin.
To safely extend the shelf life of water-based DIY lotions, you have a few options. You can make small batches to use immediately, ensuring freshness and safety. Alternatively, you can incorporate natural antioxidants like vitamin E oil to slow down oil rancidity, though this will not prevent microbial growth. For a longer-lasting product, cosmetic-grade preservatives such as Optiphen, Germaben, or Leucidal Liquid are recommended. These preservatives protect against bacteria, yeast, and mold while remaining compatible with natural ingredients, allowing your DIY lotion to remain safe, effective, and luxurious for weeks or even months.